
In building Torres App the hardest part was getting data about campsite availability from the three different companies that manage the campsites. Initially, I was running the scraper every few days from my computer but that clearly wasn’t viable so I decided to move it to AWS. Getting everything working on AWS required many hours of reading Stack Overflow and AWS docs and getting some conflicting information, so I’m summarizing what it took to get it done in three posts:
- Part 1 — Run a Python Selenium web scraper on AWS Fargate (this)
- Part 2 — Adding Browsermob Proxy to sniff traffic and have more confidence in whether the website you’re trying to scrape has loaded
- Part 3 — exception handling strategies for when something inevitably crashes
We’re going to tackle getting the web scraper running in 3 steps:
- Step 1 — Web scraper runs locally
- Step 2 — Web scraper runs locally in docker
- Step 3 — Web scraper runs in AWS
You can see the entire source code here.
Step 1 — Web scraper runs locally
Prerequisites:
- Python 3.6
- Download chromedriver and install it locally. I named my file
chromedriver76.0.3809.68make sure you have a version of Chrome that matches, for example 76 - Install selenium 3.141.0
Code (selenium_simple/settings.py)
class Config(object):
    CHROME_PATH = '/Library/Application Support/Google/chromedriver76.0.3809.68'
We’re using a settings file to make it easier to support multiple configurations in the future
Code (setup.py)
from setuptools import setup, find_packages

setup(
    name='selenium_aws_fargate_demo',
    version='0.1',
    packages=find_packages(),
    author='sergeishevlyagin'
)
Having a setup file will make it possible to install and import from our library later from selenium_simple import settings
Code (selenium_simple/main.py):
from selenium import webdriver
import argparse

from selenium_simple import settings

config = settings.Config

def demo():
    option = webdriver.ChromeOptions()
    # Options based on Stack Overflow posts and https://developers.google.com/web/updates/2017/04/headless-chrome
    option.add_argument('--headless')
    option.add_argument('--no-sandbox')
    option.add_argument('--disable-gpu')

    browser = webdriver.Chrome(options=option, executable_path=config.CHROME_PATH)
    browser.get('http://www.xkcd.com')
    comic_element = browser.find_element_by_xpath('//div[@id="comic"]//img')
    comic_alt_txt = comic_element.get_attribute('title')
    print('The XKCD comic alt_text is "{}"'.format(comic_alt_txt))
    browser.quit()


if __name__ == '__main__':
    parser = argparse.ArgumentParser()
    parser.add_argument('config', type=str, nargs='?', help='the config class')
    args = parser.parse_args()
    config = getattr(settings, args.config)

    demo()
What’s happening:
- The options are based on this post and various Stack Overflow posts and will help us later.
- For debugging you could comment out the headless part to seethe window and what the browser is doing
- We use XPATH to find the element on the page, extract an attribute and then print it.
Let’s run it:
- First install your project locally by running
pip install -e .in the base directory - The run it with
python selenium_simple Config
You should see it run and return the alt_text
Step 2 — Web scraper runs locally in Docker
Prerequisites:
- Install Docker on your machine
Create a Dockerfile to build our docker container for running selenium.
Code (Dockerfile)
FROM python:3.6

# install google chrome
RUN wget -q -O - https://dl-ssl.google.com/linux/linux_signing_key.pub | apt-key add -
RUN sh -c 'echo "deb [arch=amd64] http://dl.google.com/linux/chrome/deb/ stable main" >> /etc/apt/sources.list.d/google-chrome.list'
RUN apt-get -y update --fix-missing
RUN apt-get install -y google-chrome-stable

# install chromedriver
RUN apt-get install -yqq unzip
RUN wget -O /tmp/chromedriver.zip http://chromedriver.storage.googleapis.com/`curl -sS chromedriver.storage.googleapis.com/LATEST_RELEASE`/chromedriver_linux64.zip
RUN unzip /tmp/chromedriver.zip chromedriver -d /usr/local/bin/

# set display port to avoid crash
ENV DISPLAY=:99

# Install requirements first so this step is cached by Docker
COPY /requirements.txt /home/selenium-aws-fargate-demo/requirements.txt
WORKDIR /home/selenium-aws-fargate-demo/
RUN pip install -r requirements.txt

# copy code
COPY selenium_simple /home/selenium-aws-fargate-demo/selenium_simple/
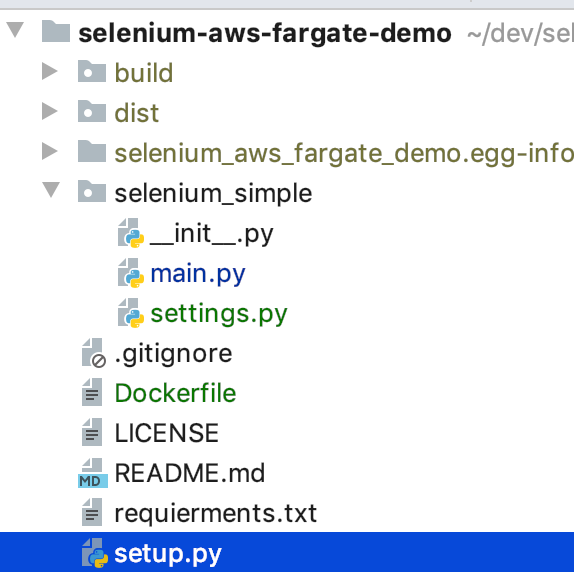
Here’s my project structure so far:
Let’s update our settings to include a Docker version
class Config(object):
    CHROME_PATH = '/Library/Application Support/Google/chromedriver76.0.3809.68'


class Docker(Config):
    CHROME_PATH = '/usr/local/bin/chromedriver'
To build the docker file type in docker build -t selenium-aws-fargate-demo . in the directory with the Dockerfile. The build process will take a few moments.
You can now run your docker image with the following command docker run -it selenium-aws-fargate-demo python selenium_simple/main.py Docker
It should result with a similar output as you had locally.
If you need to trouble shoot your docker image, this is a useful command to launch the shell docker run -it selenium-aws-fargate-demo bash to troubleshoot.
Step 3 — Web scraper runs in AWS Fargate
Let’s start by uploading your docker image to the AWS repository.
- Navigate to the repositories sections of ECS.
- Create a new repository
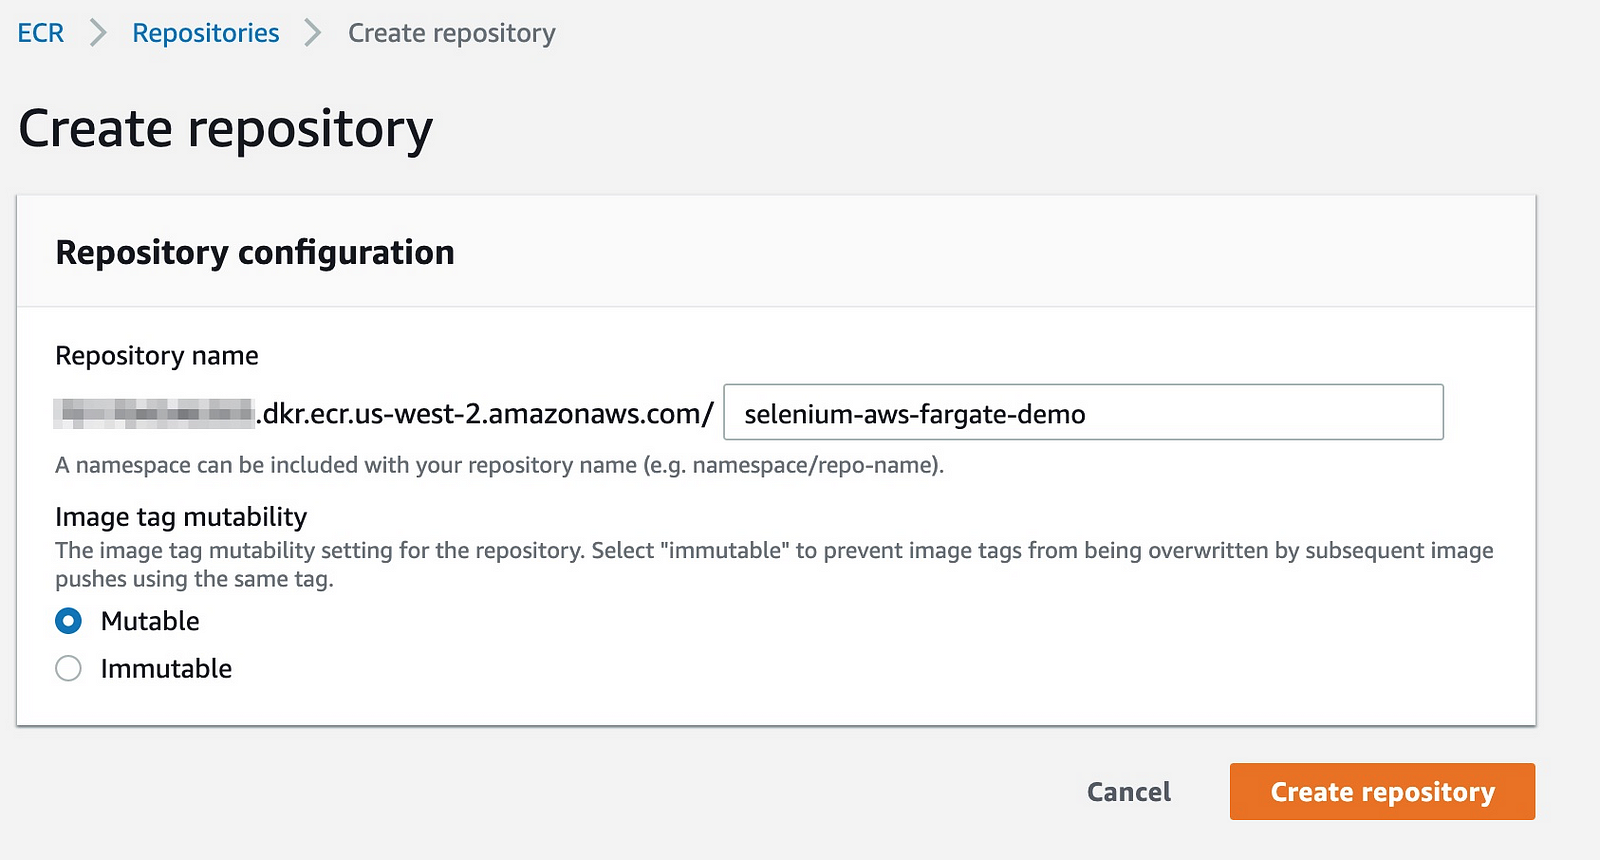
- Navigate to the repository and click view push commands. Use those to push your docker image to the ECR repository. Note, make sure you complete the steps necessary to use the ECS CLI here.
- When you’re done, you should see the image in the repository.
- Next, let’s create a cluster to run the task. Navigate to the clusters page and click Create Cluster.
- Select the “Networking Only” template, then name the cluster and click create. I’m naming mine “selenium-fargate” and I’m going to create a new VPC for it.
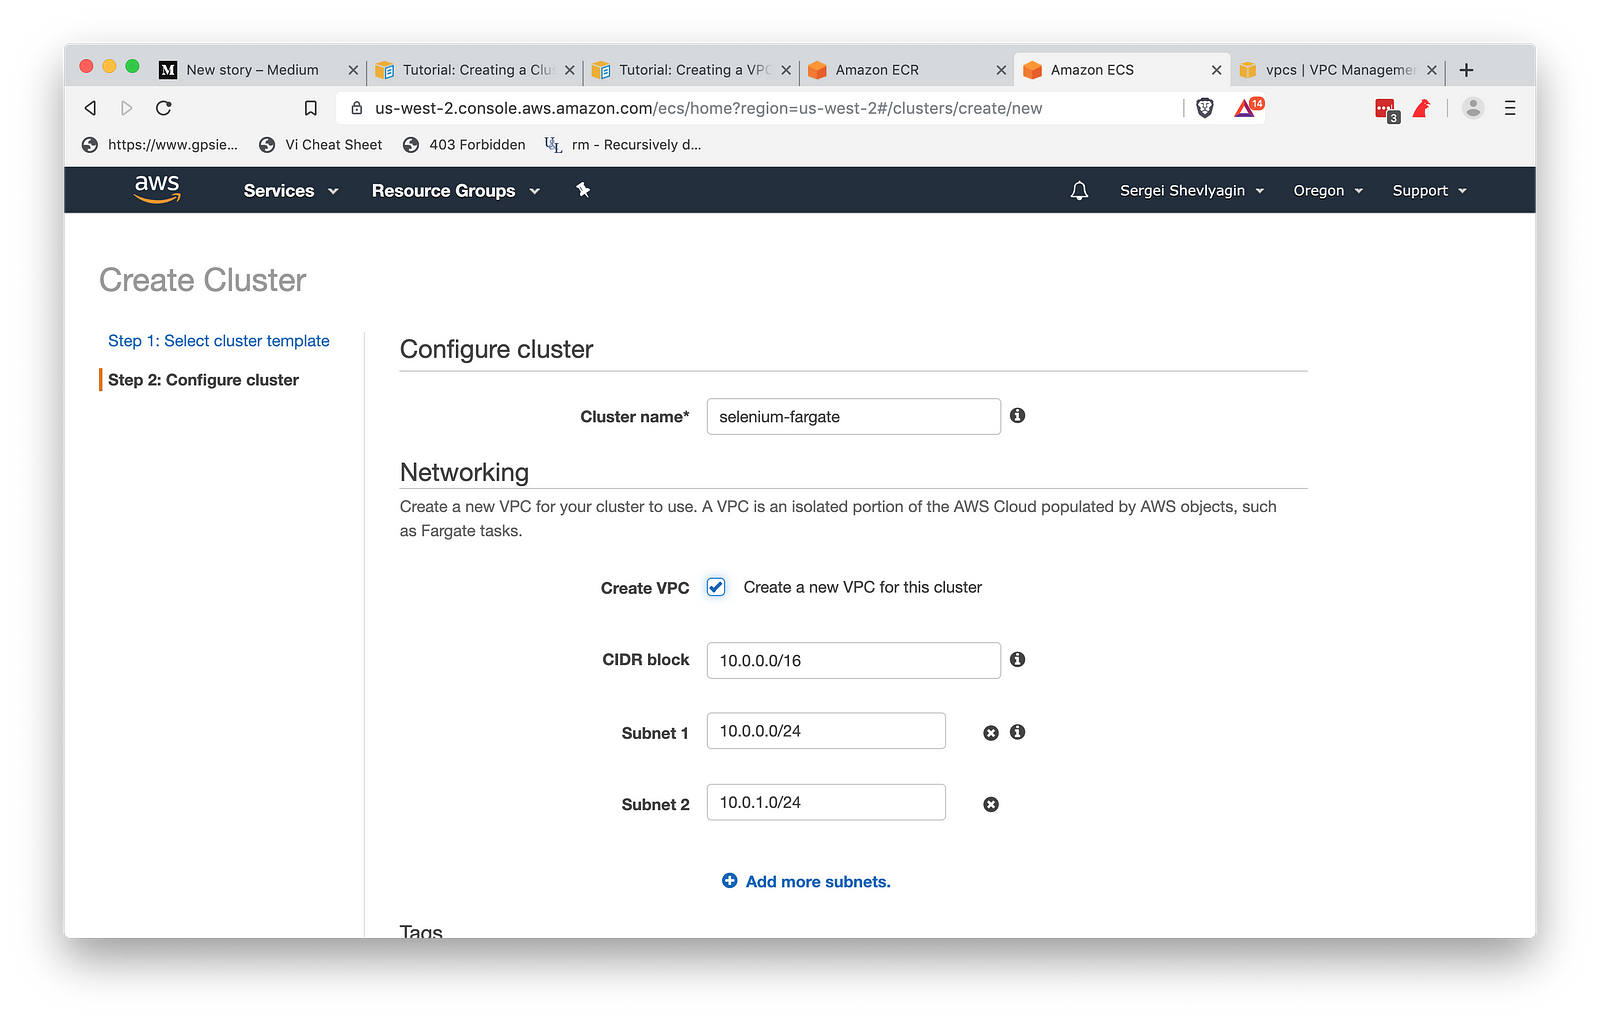
- Click “Create”
- While the cluster is being created, let’s define our task. Start in the task definitions section and click “Create New Task Definition”.
- Select a “Fargate” launch type
- Name your task, I named it “selenium_simple”
- For task role choose “None”
- For task execution role, let Amazon create a new role for you
- For task memory choose 1GB and vCPU choose .5
- Click the “Add container” button
- Fill it out as follows using the values from your container repository
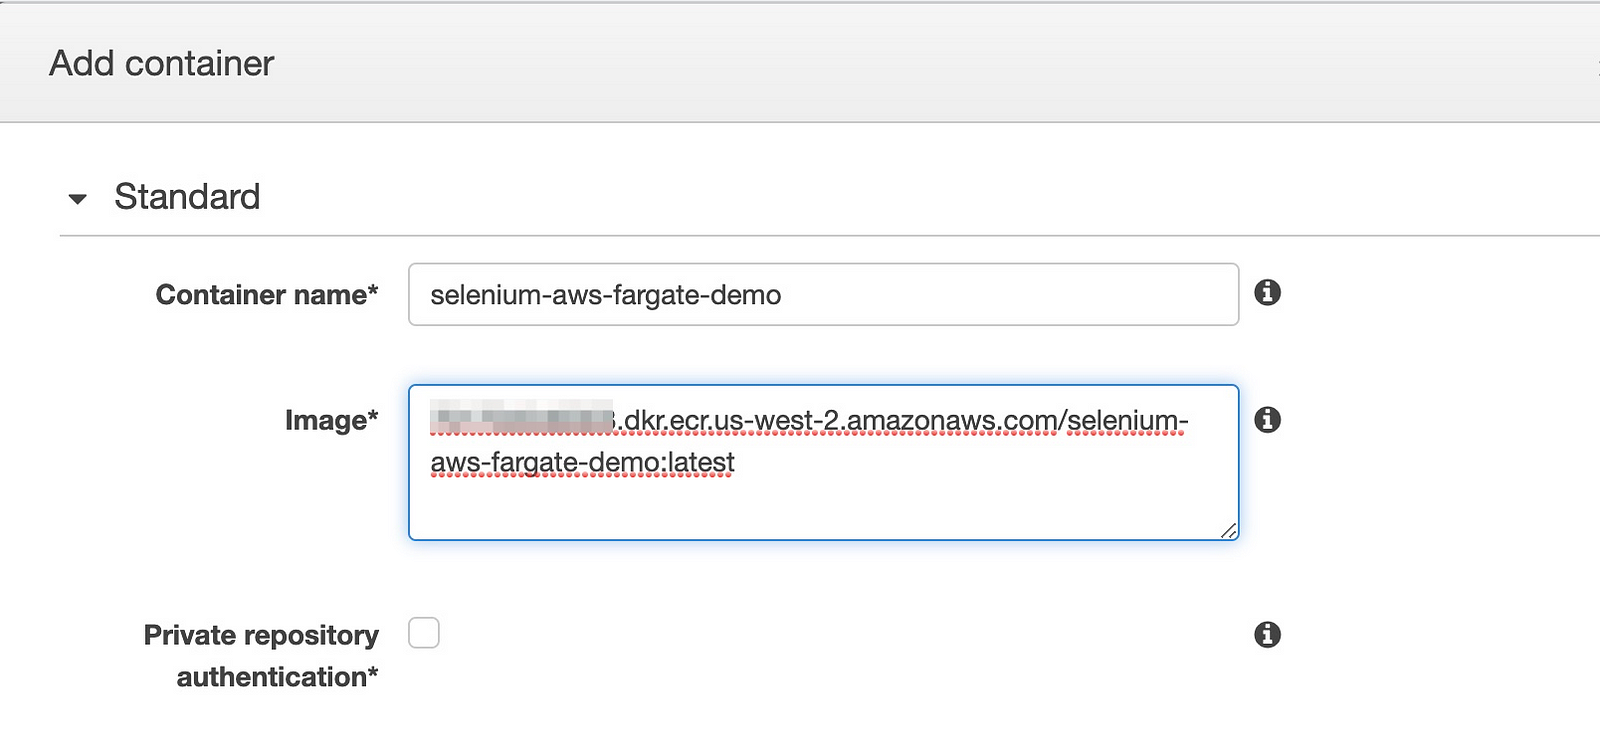
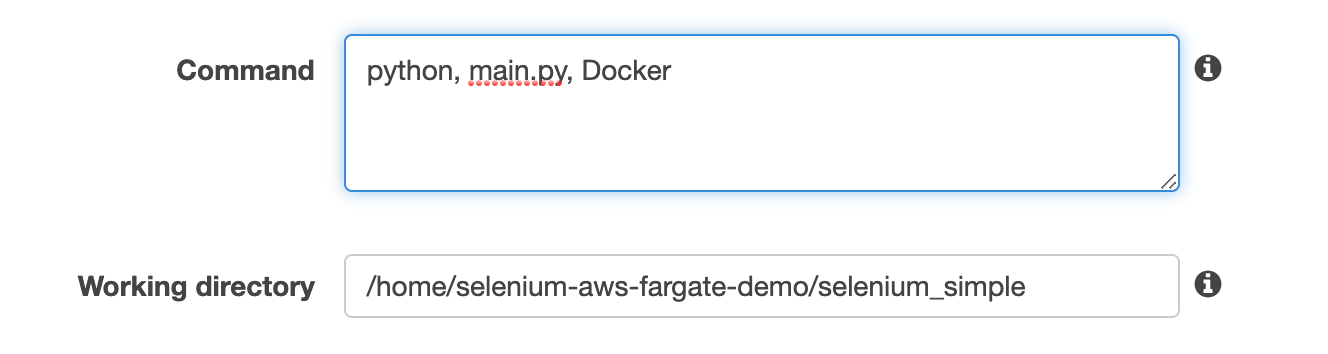
- In the environment section, set the command and working directory
- Click add to add the container and then Create to create the task.
- When it’s done, click “View Task Definition” and from actions select “Run Task”
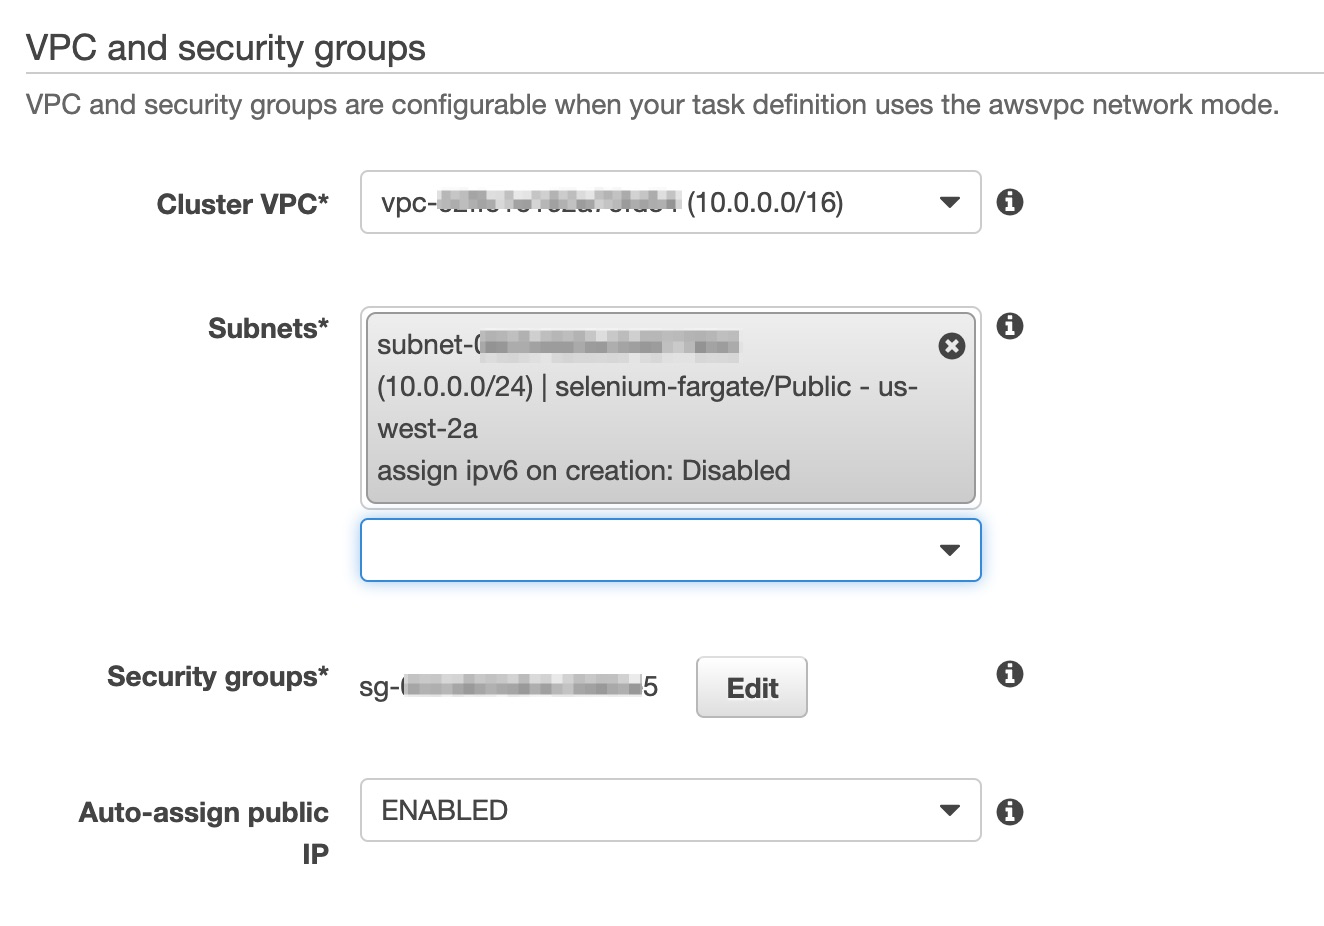
- Select launch type “Fargate” and pick your newly created cluster and any subnet.
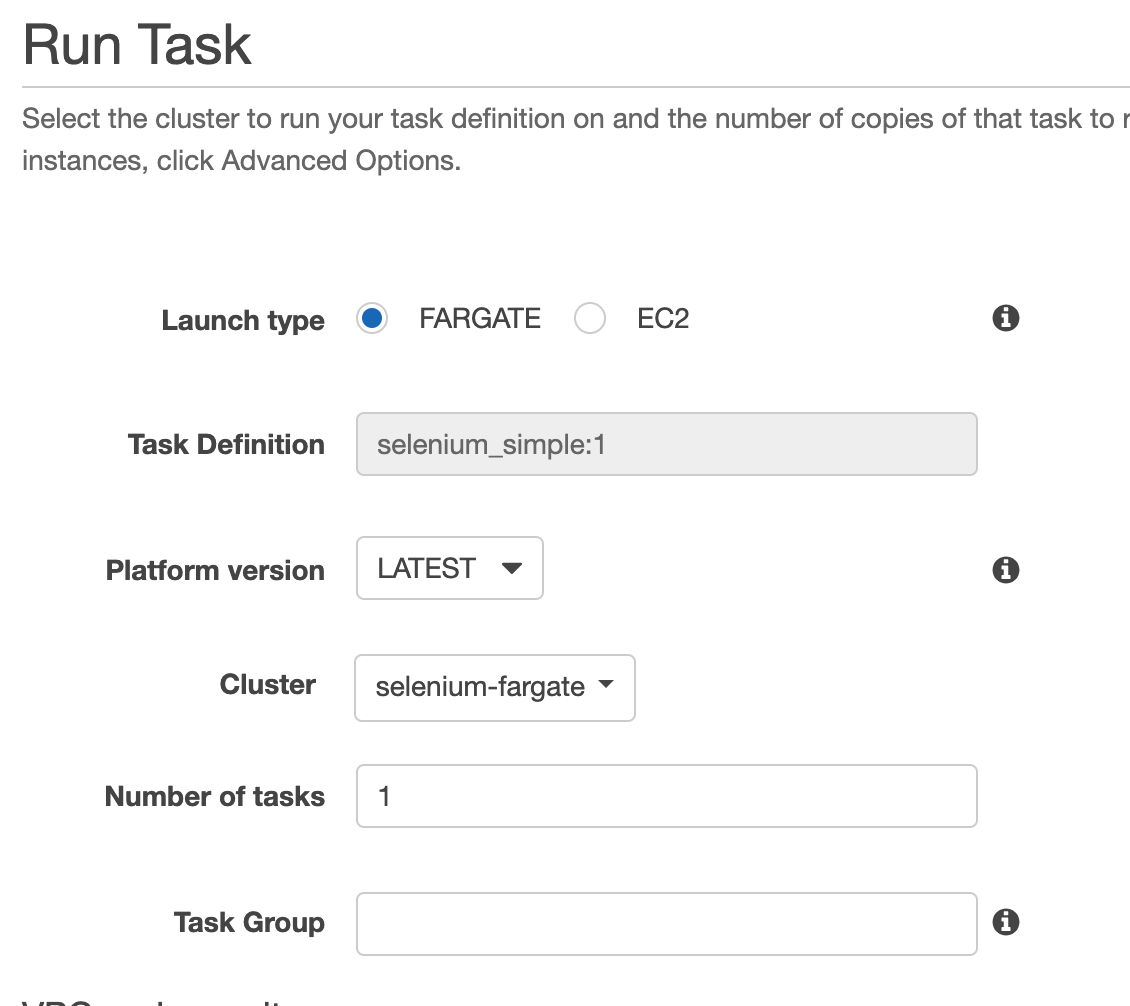
- Finally click run task, you should see it in the tasks window and you can click the task ID to view details
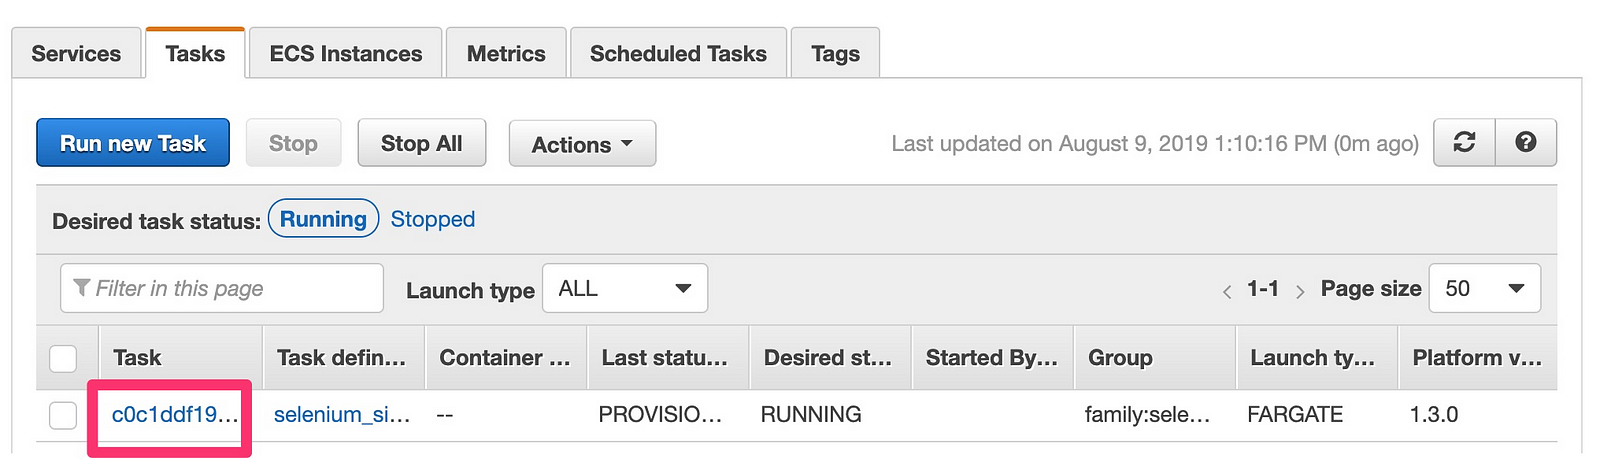
- In the task details logs tab you should see the same log message as from our local instance.
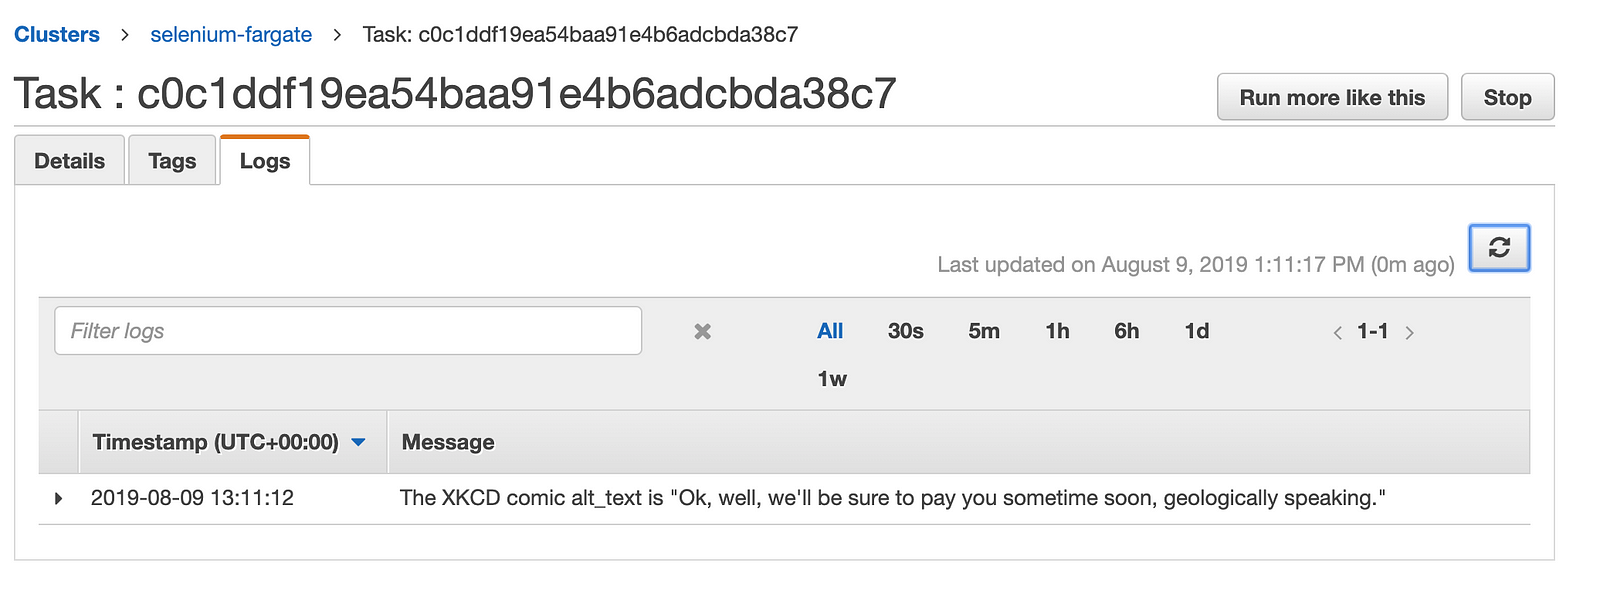
- Success!
This is my first medium post, so if you find this useful or have any feedback, holler at me in the comments or on twitter.
Credits:
The most useful and detailed source for getting this working was Robert Rocha’s write up Setting Up a Selenium Web Scraper on AWS Lambda with Python.
Comments
The script selenium_simple/main.py should be named selenium_simple/__main__.py to avoid this error “can’t find ‘__main__’ module in ‘selenium_simple'”
Thanks for reading Mario. There could have also been a typo in your main.py where if __name__ == '__main__' was defined. __main__ has special meaning in python as per https://docs.python.org/3/library/__main__.html and it was my (novice) mistake to name the file main 😀
Need to have both “selenium_simple/__main__.py” and “selenium_simple/main.py” so both running the script normal and through docker it works